Review: Atomic Filament Carbon Fiber Extreme PETG Pro

As many of you know, I got a 3D printer for Father’s Day this year. Originally, I got the Bambu Lab A1 Mini combo with the AMS Lite. Since then, I realized I needed a bit more build space, so I sold off the A1 Mini and upgraded to the full-size A1. The seemingly small move from a 1803 build volume to a 2563 build volume sounds small, but it’s a total game changer.

Direct-Feed from a Dry Box

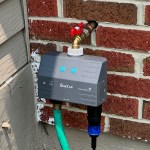
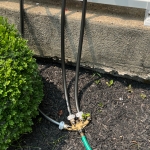
I’ve made a handful of outdoor projects, mainly centered around our fire pit area. Since the stuff lives outdoors, I can’t really make it out of PLA, like most of the stuff I make. Given the lack of enclosed space on the A1 family, I can’t print in materials like ABS or ASA, so that leaves PETG. I gave my wife her choice of colors, and she originally landed on the Bambu Lab PETG-CF in Indigo Blue. It’s a great looking filament, and while at $34.99 a roll, it’s nearly double what I spend for most of the PLA I run, it’s not crazy, so that’s fine. Bambu Lab says PETG-CF is “NOT Ideal” for use in the AMS Lite, so I direct-feed it into the extruder from above, coming from a homemade dry box. Using the dry box enables the filament to (get this…) stay dry, which is great for materials that are very hygroscopic, like TPU, certain flavors of PETG, or the wood-filled PLA I’ve been playing around with.

Having seen many folks absolutely rave about Atomic Filaments, I figured I’d give them a shot. I picked up a 1 kilo spool of their Smoke Blue Carbon Fiber PETG Pro, which is a super close match to Bambu’s Indigo Blue PETG-CF. Since I’m starting to run a bit low on the Bambu stuff, I figured I’d go with the near-match on color. The Atomic filament was priced at $49.99, which I paid for myself, same as the Bambu Lab filament. I decided as part of this review to do a head-to-head comparison of the products as well, though not a really exhaustive one.

Testing Methodology

My test plan isn’t terribly complex. My main goal is to see if the $15 delta between the two products is worth it (to me). Here we go…

I started off by emailing Atomic’s support to find out if they had any guidance for creating a custom filament profile in Bambu Studio. Their advice was pretty straightforward. Model off the Bambu profile and change a couple of parameters – nozzle temp at 270C and bed temp at 77c. Easy enough!

  1. Dry each filament in my Creality filament dryer for 8 hours at 60C/15% RH.
  2. Place each roll in a dry box and let them settle down overnight. Make sure conditions inside are comparable.
  3. Print this bottle opener.
    • 0.4mm nozzle
    • 0.2mm layer height
    • 6 walls
    • 15% Cross-hatch infill
    • Textured PEI plate, cleaned before printing with 99% Isopropyl Alcohol
    • Print on different, but adjacent spots on the plate
  4. Compare the results.

The best laid plans, right? Every test plan hits some sort of snag, naturally. Mine was the fact that Atomic’s spool was just too wide to be used inside my dry boxes. As a work-around, I ended up respooling it onto an empty Sunlu spool I has laying around. Bonus – I got to test the respooling tool I recently printed! It took about 10 minutes using a drill to drive the filament.

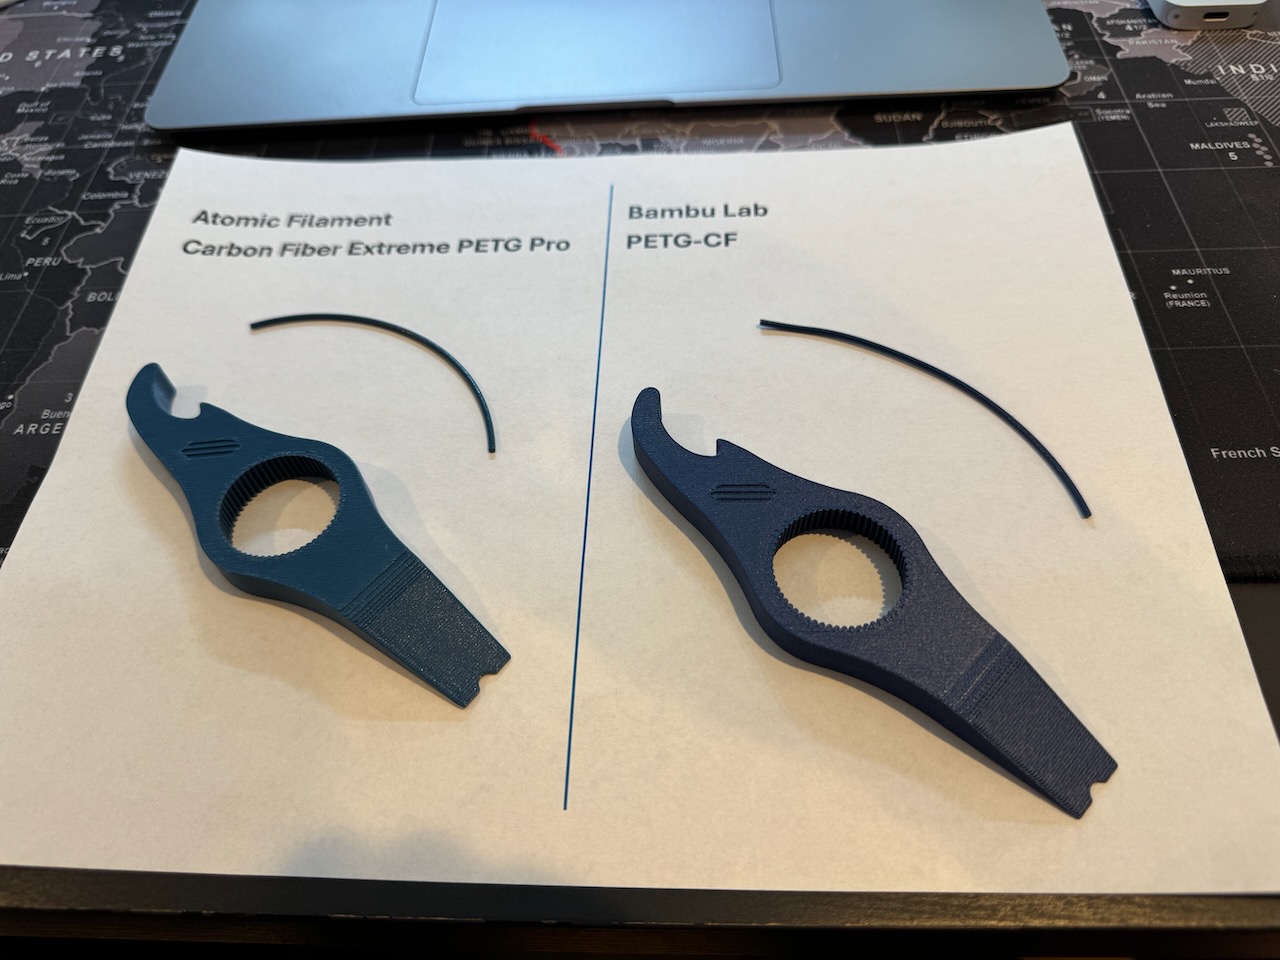
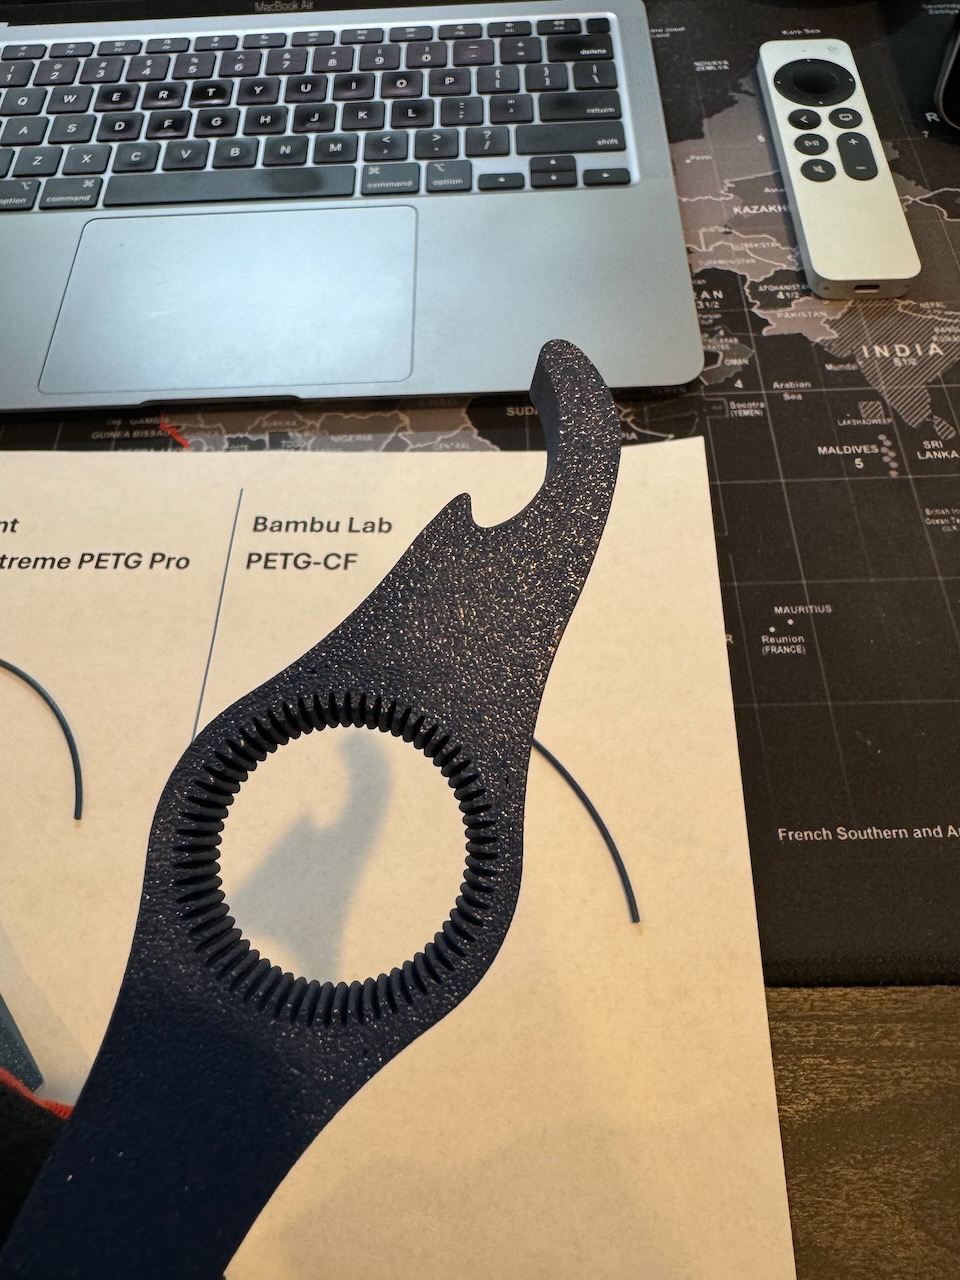
Pre- and Post-Print Filament Appearance

Here you’ll see some pics showing a direct comparison side-by-side. You’ll note the Atomic filament is definitely more glossy in appearance both before as well as after printing. Both products printed beautifully, and the resulting bottle openers look great. I’ve found this model to be tough to really “get right” – as there are lots of tight little spots, often resulting in minor gaps/under-extrusion. Both products had similar issues in the same exact spots, though neither was terrible.

One bit worth noting – the Bambu Lab filament is MUCH more finicky in terms of releasing from the plate. If you’re not careful and don’t wait until the plate cools to at least 40C before you start trying to remove the print, you’ve got a good chance of warping your print or making a bubble of sorts when you pull it off. Notably, the Bambu stuff almost always shows a residue on the bottom of the print (it’s a bit more visible toward the top, by the hook on the back). It comes right off with the application of some heat from a heat gun or a second or two from a flame. I’ve got one of those groovy Hacksmith Lightsaber torches, so I use that. Yes, it’s super badass. Yes, I make dorky lightsaber noises while I’ve got it ignited.

Conclusion

While the Atomic filament looks excellent and also prints beautifully, so does the Bambu filament. Between the $15 premium for the Atomic product and my need to respool it (you may not, depending on how you plan to house the filament), I think my next PETG-CF buy will go back to Bambu Lab. I might try out Protopasta, but their stuff is even more expensive. So maybe not. Flashforge seems to have some PETG-CF that’s reasonably well regarded on Amazon, so there’s that as well.

Still Here?

Have fun watching some timelapses that Octoprint made of each print. Good luck telling which is which without reading the captions…

Atomic Filament’s Carbon Fiber Extreme PETG Pro
Bambu Lab’s PETG-CF

That Time AI Drove Me to Starbucks

So, I’ve been in Scottsdale, AZ for a work event these past few days. Solid event, good content, caught up with folks I haven’t seen in a while too. We wrapped with a dinner last night, and I’m headed home this morning. I’ve got a bit of time before my flight, so I figured I’d head down the road and get a bite at the Starbucks. Yeah, I know. I flew 2000 miles to go to Starbucks. But hey, it’s consistent, and I was feeling indecisive.

Outside view of Waymo Car
Outside view of the Waymo Car

I packed up my stuff so I can roll out to the airport when I’m done, leaving me with the need to get a mile up the road to the Starbucks. Not being jazzed about walking that while dragging my stuff, I caught a car. During the event, our AI Guru was talking about taking a fully autonomous car ride that week, so how could I resist, right? So, I grabbed the Waymo app and got registered.

Setting up the ride was about the same as Uber. Where are you going, confirm where you are right now, etc. The app said it would take 10 minutes for my ride to get there. My chariot, a highly modified Jaguar I-PACE EV SUV arrived in 8 – not bad! The car’s got a TON of cameras plastered all over it.

You unlock the doors with the Waymo app, which lets you pop the trunk as well. Dropped my stuff in the trunk, hopped in, got the intro briefing from the car, and off we went. It didn’t demand I buckle up until we were already moving and did so LOUDLY. Ok, whatever, safety first. Or at least third, right? You can control the music in the car with the touchscreen in the back, or with the Waymo app. I settled on Alternative and was treated to some Noah Kahan tunes.

If I’m honest, we got off to kind of a rocky start. There was a bunch of construction in the complex where the hotel was. I think the car got a little confused. Rather than go out the front exit, the way it entered, it took me out the side exit. It then proceeded to ignore the directions of one of the construction workers. No amount of her waving her arms telling the car to stop helped. Fortunately, we were creeping along at a blistering 5mph, and everyone was overall cool. The next worker up the way was a little bolder, standing in the middle of the street, directing the car. That time, the Waymo followed the worker’s directions, and off we went.

As far as driving style goes, for that early part of the ride, I’d describe it as similar to how my 17-year-old drove right after she got her license. Incredibly tentative about seemingly everything. She’s doing great now, by the way, and I’m sure Waymo will get there too. Once we got out on the main roads, the ride was really smooth. The Waymo drove courteously and safely. It got me to the Starbucks about a mile away in about 10 minutes. This was due mainly, of course, to the weird exit route.

As for dropping me off, well, that’s another matter. I punched in the address of the Starbucks, but the car sort of missed a little. The Waymo looked around for a spot to pull over and drop me off and settled on the far end of the parking lot. Again, whatever. Safety third, I guess.

The car was kind enough to remind me to take all my stuff with me, including the stuff in the trunk. It even automatically popped the trunk for me.

What’s the actual ride like? I grabbed a bit of video to show it off. Enjoy!

Keeping Plants from Dying of Thirst

My wife LOVES to decorate with plants. She does it on the front porch, both with big pots with nice looking plants, as well as some hanging plants on either side of the porch. She does a great job of picking stuff out, planting, and styling the whole setup.

You know what she’s not always great at? Remembering to water those plants. NJ Summers being what they are (HOT!), it’s easy to forget for a day or two and end up with plants that are gasping for life, in desperate need of a drink. That’s where I come in. Having recently had surgery and not being able to execute the 2nd half of this plan on my own, thankfully I had a bit of help from a friend. I did manage to get the first part done before my surgery though.

So, for the front porch, she’s got 3 big pots with plants in them, and there’s the 2 hangers flanking the porch. I ended up deciding to split this into 2 watering zones, given how differently I’d be attacking each problem.

Feeding the whole thing: LinkTap D1

LinkTap D1

I searched and searched for the right solution. At first, I planned on doing this using Alexa Routines, as I use to automate most things. I first looked at the B-Hyve from Orbit. It didn’t expose Alexa actions, so I was stuck with mimicking Alexa voice commands in my routines. Not a big deal. The things that were a big deal to me? It didn’t stay connected reliably to our WiFi, despite being a few feet from an AP. That was one, and the second was when I called them to troubleshoot, they couldn’t understand the difference between Bluetooth and WiFi. I returned it.

I also looked at Rachio, but it was VERY hard to get ahold of at the time, so I moved on. Then I found LinkTap and went with them. I opted for their 2-zone D1 model, including the Gateway device.

LinkTap uses a Hub/Gateway model, which is of course, very common in the IOT world. The timer devices, called TapLinkers use Zigbee to talk back to the Gateway device. Setup was a snap. The app is absolutely hideous, but easy enough to work with. Setting up a schedule is pretty straight forward as well, so no complaints there.

My only complaint with LinkTap is their Alexa skill. When you invoke it to start a watering cycle, it always talks. So, when I set the routine up, every time it waters something, I’d hear “Got you. Now watering on XXXX.” Kind of annoying. Ultimately it caused me to junk the Alexa Routine for watering and break my own rule about home automation – I setup my watering routines in their app.

As a bonus, LinkTap offers a decent REST API. I haven’t done much of anything with it yet, but it’s good to know it’s there. LinkTap also has a line of valves designed for more “fixed” applications like sprinkler systems and such. Those are referred to as ValveLinkers.

Watering the Big Pots: Soaker Hoses

Manifold for Soaker Hoses

My first LinkTap zone is used for the big pots on the porch. I’m running a single leader hose from that tap out to one of those 4-way brass manifolds you can pickup at Home Depot. I’ve got 3 of the 4 taps on that open, each connected to a short feeder hose that runs to each pot. These hoses are made to custom lengths. How? I bought a 50-foot garden hose and a bunch of those repair ends for it. I cut the garden hose into the segments I needed and attached the appropriate ends. Those 3 hoses run to each of the 3 pots. In the pots themselves, I’ve got custom-length soaker hoses, built from one of those kits you can pickup in Home Depot. My wife bought one of those kits a couple of years ago, and it was just hanging out in the garage, waiting for this occasion.

Watering the Hanging Pots: Drip Irrigation

Hanging Pot

This was my first foray into drip irrigation, so I had a bit of read-up to do in order to figure out what I needed to buy to do the job right. Turns out that it was super easy to get it done. Water pressure is important, so I started with a pressure regulator, followed by an adapter to drop down from the usual 3/4″ garden hose fitting down to 1/4″ tubing.

As for tubing, I opted for polyethylene tubing, as it’s a bit more durable than PVC, though a bit less flexible than PVC. I felt the trade-off was worth it though. From the LinkTap to the porch itself, I used black tubing, held in place on the ground using those “staples” you use to hold landscape fabric down. When we reached the post we were going to run up to the top of the porch, we inserted an elbow and changed to white tubing, which we secured to the post using those U-shaped clips you see cable tv installers use to secure coax to baseboards. I had a bunch of those laying around, so nothing left to buy.

At the top of the porch, we used a T-fitting to split the runs to the 2 hanging plants, included a shut-off valve for each plant, and finally the drippers above each plant. You can see the shut-off valve and the dripper in the image just above!

I wouldn’t have been able to get this part done without the help of my good friend John, so thanks!

How it all Fits Together

The final layout

The Shopping Lists

The Timer

ProductLink
LinkTap D1 with Gatewayhttps://www.amazon.com/dp/B0B3DZHHXL

The Porch Pots – Soaker Hoses

ProductLink
50-foot Garden Hosehttps://www.homedepot.com/p/100022734
Hose Repair Endshttps://www.amazon.com/dp/B0C6SX8B4S
4-way Hose Manifoldhttps://www.homedepot.com/p/303652362
Soaker Hose Kithttps://www.homedepot.com/p/310333284

The Hanging Pots – Drip Irrigation

ProductLink
Rain Bird Pressure Regulatorhttps://www.amazon.com/dp/B0049C5FZA
Rain Bird 1/4″ Tubing Adapterhttps://www.amazon.com/dp/B000BQU75Q
Rain Bird 1/4″ White Poly Tubinghttps://www.amazon.com/dp/B000BO6QUI
Rain Bird 1/4″ Black Poly Tubinghttps://www.amazon.com/dp/B008RH61SS
Rain Bird 1/4″ T-Fittingshttps://www.amazon.com/dp/B000AQG9LS
Rain Bird 1/4″ Elbow Fittingshttps://www.amazon.com/dp/B000AQG9KY
Rain Bird 1/4″ Shut-Off Valveshttps://www.amazon.com/dp/B00NOA4NOW
Axe Sickle Adjustable 1/4″ Drippershttps://www.amazon.com/dp/B087WRYQ3K

Junos Configuration Archival With Oxidized

One of the great things about Junos is the automatic on-box configuration backup and instant rollback, right? Seriously, if you screwed things up in the recent past, you can easily recover by popping into configure mode, rolling back and committing your config. Plus, there’s amazing tools that prevent the walk/drive of shame like commit confirmed that go hand-in-hand. What I would have given all those years ago to have had tools like that in the bag when I was working on other platforms!

All that stuff aside, the on-box stuff is no substitute for long-term archival. Historical records of where system configurations have gone over the course of time is a big deal, operationally speaking. In Cisco-land, one of the old stand-by tools is RANCID. And yes, it works for Junos as well. But what if there was something better? What if there was something a bit more modern that better integrated with an up-to-date toolkit? Enter Oxidized.

Oxidized talks to a bunch of platform types, and outputs a bucket of different formats. You can do simple things like output the latest config as a text file, or you can output git repos either by groups of devices, or a single repo. You can even do things like have the tool perform HTTP POST operations to custom tools you’ve created. Backing up to the git repos for a second… Right along with that, you can have Oxidized push the local repo to a remote git repo as well, be that on the local network, or in the cloud somewhere! On top of all this, in addition to having its own nice web UI, Oxidized has really great integration with LibreNMS (which I use myself in my Homelab).

In the example I’m going to show, I’m going to use the Dockerized version of Oxidized to archive the configuration of my 3x EX2300-C VC at home. It will backup the config to a local git repo as well as push the config to a private GitHub repo. All communication over the network will be secured using SSH with ED25519 keys. No passwords are sent over the network at all! Ready? Let’s get started. I’m going to assume you’ve already got Docker and Docker Compose installed. If you don’t, get that done. There are more guides out there than I can count on that topic, so go ahead and locate one, and come back. 🙂

Ready? Ok, let’s go. I’m going to assume we’re building this on a Linux machine. If you’re not, as always “your mileage may vary”. Please feel free to comment below and contribute any adjustments you had to make to get things cooking on different platforms!

I’ll start by making a directory structure in my home directory where I’ll be working, then setting up my SSH key that the solution will use.

$ mkdir oxidized

$ cd oxidized

$ mkdir oxidized-volume

$ cd oxidized-volume

$ mkdir -p .config/oxidized

$ mkdir .ssh

$ chmod 700 .ssh

$ cd .ssh

$ ssh-keygen -t ed25519 -f id_ed25519 -C oxidized@blog.jasons.org
Generating public/private ed25519 key pair.
Enter passphrase (empty for no passphrase):
Enter same passphrase again:
Your identification has been saved in id_ed25519
Your public key has been saved in id_ed25519.pub
The key fingerprint is:
SHA256:[redacted] oxidized@blog.jasons.org
The key's randomart image is:
+--[ED25519 256]--+
[  also redacted  ]
+----[SHA256]-----+

$ cat id_ed25519.pub
ssh-ed25519 [redacted yet again] oxidized@blog.jasons.org

Next, we’ll create our docker-compose.yaml file in the top-level directory (at the same level as the oxidized-volume directory, above).

---
version: '3'

services:
  oxidized:
    image: oxidized/oxidized:latest
    container_name: oxidized
    tty: true
    volumes:
      - ./oxidized-volume:/home/oxidized
    environment:
      - CONFIG_RELOAD_INTERVAL=3600
    restart: unless-stopped
    networks:
      - oxidized

networks:
  oxidized:
    name: oxidized
    driver: bridge
    attachable: true
    driver_opts:
      com.docker.network.bridge.name: br-oxidized

Next, setup the GitHub Repository. In my case, it’s going to be called jcostom/oxidized, and it will be private. In other words, I’ll be the only one who will be able to see or access the repo. Below, you’ll see the repo settings I chose.

Creating a Private GitHub Repo

After you’ve created the repo, you’ll need to add your SSH key to the repo. Hit the Settings link on the top row, and on the left side, choose Deployment Keys. Add your SSH key.

Adding an SSH Key

Up next, let’s prepare our Junos devices to be backed up by Oxidized. To do this, we’re going to create a fairly restricted user class and a login that Oxidized will use. The authentication method will be… you guessed it! The SSH key we just generated before. So, the set of commands we’ll need to deploy to our Junos devices will look something like this:

set system login class oxidized permissions view-configuration
set system login class oxidized allow-commands "(show)|(set cli screen-length)|(set cli screen-width)"
set system login class oxidized deny-commands "(clear)|(file)|(file show)|(help)|(load)|(monitor)|(op)|(request)|(save)|(set)|(start)|(test)"
set system login class oxidized deny-configuration all
set system login user oxidized class oxidized
set system login user oxidized authentication ssh-ed25519 "ssh-ed25519 [redacted yet again] oxidized@blog.jasons.org"

Ok, so commit that config and you’re ready on the Junos side of things. Now we just need to finish up configuring Oxidized and we’ll be all done! Let’s create our Oxidized config. I won’t go through all the intricacies of this sample config, and yes, I’ll grant you that this is probably slightly more complex than it needs to be. That said, it’s ready to be expanded to accommodate additional system types really easily by adding additional groups and mappings. The 2 files, config and router.db both go in $DIR/oxidized-volume/.config/oxidized.

First, the config file:

---
model: junos
interval: 3600
use_syslog: false
debug: false
threads: 30
timeout: 20
retries: 3
prompt: !ruby/regexp /^([\w.@-]+[#>]\s?)$/
rest: 0.0.0.0:8888
next_adds_job: false
vars:
  auth_methods: [ "publickey" ]
  ssh_keys: "/home/oxidized/.ssh/id_ed25519"
  # log: /home/oxidized/.config/oxidized/oxy.log
groups:
  jnpr:
    username: oxidized
    model: junos
pid: "/home/oxidized/.config/oxidized/pid"
input:
  default: ssh
  debug: false
  ssh:
    secure: false
output:
  default: git
  file:
    directory: "/home/oxidized/.config/oxidized/configs"
  git:
    single_repo: true
    user: oxidized
    email: oxidized@blog.jasons.org
    repo: "/home/oxidized/.config/oxidized/configs.git"
hooks:
  push_to_remote:
    type: githubrepo
    events: [post_store]
    remote_repo: git@github.com:jcostom/oxidized.git
    publickey: /home/oxidized/.ssh/id_ed25519.pub
    privatekey: /home/oxidized/.ssh/id_ed25519
source:
  default: csv
  csv:
    file: "/home/oxidized/.config/oxidized/router.db"
    delimiter: !ruby/regexp /:/
    map:
      name: 0
      model: 1
      group: 2
model_map:
  juniper: junos

Then the router.db file:

myswitch.mydomain.com:juniper:jnpr

We’re just about ready to start things up! The Oxidized Docker container runs as an unprivileged user (hurray!), with both UID and GID 30000. So, we need to set the file ownership. You’ll need to change the ownership of the oxidized-volume and everything below it. The command is: sudo chown -R 30000:30000 oxidized-volume

Finally. We’re ready to start this thing up. There will be one final hiccup though. We’ll get through it. I promise. A final check – this is what your directory structure should look like… I’m going to assume you understand Unix file permissions. The permissions below are pretty basic – nothing crazy.

drwxrwxr-x 30000    30000        4096 Apr 27 11:16 ./oxidized-volume
drwxrwxr-x 30000    30000        4096 Apr 27 09:38 ./oxidized-volume/.config
drwxrwxr-x 30000    30000        4096 Apr 27 11:15 ./oxidized-volume/.config/oxidized
-rw-rw-r-- 30000    30000          36 Apr 27 10:02 ./oxidized-volume/.config/oxidized/router.db
-rw-rw-r-- 30000    30000        1120 Apr 27 10:06 ./oxidized-volume/.config/oxidized/config
drwx------ 30000    30000        4096 Apr 27 11:16 ./oxidized-volume/.ssh
-rw-r--r-- 30000    30000         106 Apr 27 10:21 ./oxidized-volume/.ssh/id_ed25519.pub
-rw------- 30000    30000         419 Apr 27 10:21 ./oxidized-volume/.ssh/id_ed25519
-rw-rw-r-- jcostom   jcostom       435 Apr 27 09:38 ./docker-compose.yaml

Ready to launch? Let’s Gooooooo! Get into that top level directory where your docker-compose.yaml file is and run the command docker-compose up. Provided you followed all the steps in order, and everything’s working, the oxidized/oxidized:latest image got pulled from DockerHub and launched per what’s in your Compose file. The first time you run things, you’re going to see an error that says Rugged::SshError: invalid or unknown remote ssh hostkey. That’s because the image doesn’t have the GitHub SSH key stored. We’re going to fix that though! Get to another terminal window and run this command: docker exec -it -u 30000:30000 oxidized /bin/bash

That’s going to drop you into a bash shell inside the Oxidized container. The first time out, we’re going to manually push to GitHub. Ready to fix it? Here goes.

cd ~/configs.git
git push --set-upstream origin master

You’ll get asked about accepting the SSH key, you’ll (naturally) say yes, the push will work, and you’re done. You can exit that shell with a Control+D. You can check the repo to see the push was successful. Here’s what mine looks like after that first push.

config backup in GitHub

Guess what? You’re all done! You’ll probably want to hit Control+C in that Docker Compose session, and restart with a docker-compose up -d, which will start the services in the background, rather than the foreground. Every hour, Oxidized will poll your systems to see if the configs have changed. If so, the config will be backed up and pushed out to your private GitHub repo.

With the GitHub UI being as good as it is, you can probably see why I don’t bother with the Oxidized Web UI. Between it and the integration with LibreNMS, I simply have no real need for yet another way to consume the tool!

Keeping GitHub Actions Up to Date with Dependabot

Over the past couple of years, I’ve built a number of tools that are delivered as Docker containers. Part of the workflow I’ve setup involves automatic container builds using GitHub Actions.

It works great – I commit to the main or dev branches and I get a new container version tagged as :latest or :dev, respectively. I create a new release version, and I get a new container version tagged as :version-number.

BUT, and there’s a but. There’s always a but, right? I’m talking about automatically updating the individual actions in my actions scripts to keep pace with new releases. Doing that manually is work for just 1 container. For a bunch? Forget it.

Dependabot has entered the chat.

What does Dependabot do? Its purpose in life is to look through your repo and keep versions of various bits up to date. Simple, right? Ok, like I said before, I’ve got a number of containers I maintain. Between my container build and old version cleanup scripts, I use 7 actions. Multiply that times 14 container repos, and that’s a total of 98 action instances to keep up to date. Hands up, who wants to do that by hand? Nope.

The other thing I’m using Dependabot for is to keep certain bits in my Dockerfiles up to date as well. The main one I look out for is the python:3.x slim images. All of this is configured using a YAML file that I drop in the repo as /.github/dependabot.yml . Here’s an example dependabot.yml file:

version: 2

updates:
  - package-ecosystem: github-actions
    directory: /
    schedule: {interval: weekly}
    reviewers: [jcostom]
    assignees: [jcostom]

  - package-ecosystem: docker
    directory: /
    schedule: {interval: weekly}
    reviewers: [jcostom]
    assignees: [jcostom]

This example will review my actions scripts as well as my Dockerfiles weekly and propose updates in the form of pull requests.

Lots of great tutorials exist out there on Dependabot. Hopefully this piece has generated enough interest to get you started!

Synthetic Media, AI-Driven Scams, Deepfakes, and You.

Around the middle of last year, I had to roll up to my company’s offices in New England for a couple of days of meetings. As I often do on such drives, I tune into a podcast or two between calls. During that drive, I caught a couple of episodes of the Politcology podcast. They ran a really great 2 part series about politically-motivated deepfakes (Episode 1 & Episode 2) which touched on other areas that are more relatable to our everyday lives.

They kicked off the first episode talking about the now-famous video that Jordan Peele and BuzzFeed created, showing President Obama saying things he never actually said. Here, check it out if you’ve never seen it:

This video was made a few years ago – back in 2018. If you really pay attention, you’ll notice that the voice isn’t quite right. It’s not perfectly synchronized with the facial movements, plus you can tell it’s not actually Obama’s voice. But, it’s good enough to convince a lot of folks, particularly those who aren’t well-informed, or just not paying attention.

Fast forward 5 years to 2023. How has the tech changed? Naturally, software has improved, plus there’s more compute power than ever. There are open-source tools out there to analyze existing media and leverage it to synthesize additional media. We’ve even seen attempts to use these tools in the past year. Look at the Russian invasion of Ukraine – I can recall at least 2 instances of faked videos used as propaganda tools. While better, one can still tell these videos are fakes.

The much greater danger we all face today is less about faked videos of world leaders and more about faked audio leveraged by criminals. Consider the voiceprint authentication systems we’re now seeing many companies deploy to verify our identities when we’re calling in for some sort of service. With just a few seconds of voice sample, the technology now exists to “put words in your mouth” – making synthetic recordings of you saying pretty much anything.

Ok, am I being an alarmist? Have I joined the tin-foil hat squad? I’ll point you to this recent article from TechCrunch about Microsoft’s VALL-E research project. Input 3 seconds of real speech audio from a person, and now you’ve got the power to produce whatever you’d like to hear, but in that person’s voice, with their diction, even with normal-sounding background noise. Now, imagine your bank deploys a voice-based authentication system like this. Some crook takes a few seconds of your voice, uses a tool like VALL-E, and whammo! Access to your accounts is granted.

Ok, so that’s audio – how close are we to average folks having access to manipulate someone’s likeness in a reliably, reproducible way? That’s today. In the past 10 minutes, I started off by going to Phil Wang’s This Person Does Not Exist site. There, I generated 2 face images, 1 male, 1 female. Next, I dropped these images into my iCloud Photo Library, got on my phone and used the FaceApp app to change the gender of each of these people. Check out the results below. “Originals” on the left, gender transformations on the right. Remember – none of these images are real people. They’re all generated and manipulated through software that uses AI.

Nifty, huh? Now, how about I take Mr. Fake Man and make him sing to us using the Facedance app?

It’s Corn!

Ok, I’ll be first in line to point out how not-perfect that video is. But, consider that I made it in about 10 seconds, using a free app on an iPhone 13 Pro. That tech’s only going to continue getting better at pretending.

So what to do? It seems clear that the present danger surrounds audio. I saw an interview the other day with a man who claimed to have been nearly scammed by a crook pretending to be one of his friends who needed a quick financial bailout. Had he not taken a moment to call the friend’s wife to check up about that voicemail first, he could have easily been scammed. My best advice? Verify before you send any money, even if it’s your family or best friend. Maybe even establish some sort of pre-arranged password or other way to authenticate the person on the other end.

Building a Terminal Server from a Pi4

Sometimes in the world of networking, you just need console access to a device. Most of the time, it’s fine to connect in-band, over the network, but other times? You need to do stuff that takes that same network out of service, so out-of-band, or OOB is a must-have. To that end, most network devices offer serial console ports. Some use old-school DB9 connectors, others use an RJ45 jack, and many newer devices use USB-based console ports.

On the first 2 cases, you typically need some sort of USB serial adapter connected to your computer to make the connection. A couple of the most common chipsets used are the Prolific PL2303 family of chipsets, and the Silicon Labs CP210x family of chipsets. Interestingly, the USB-based console devices move that chipset out of an adapter and inside the network device. Hook up a USB-A (or -C) to Mini or Micro-USB cable, and you’re ready to connect to the device using the serial console app of your choice. Many of the latest devices have even shifted to USB-C for these onboard ports (and there was much rejoicing!)

So, my requirement? I’ve got 5 things in the rack in my home office that have serial console ports. All but 1 of them offers the USB console option, all of which use the Mini-USB connector on the device. So, off to the IOT junk box I keep, scavenging for parts. I found a pre-COVID supply chain disaster Raspberry Pi 4 board with power supply and a USB 3.0 hub. Why the hub? Well, the Pi only has a small number of USB ports, and I need more devices connected, so the hub solves that issue. I decided to beef things up a bit with the Argon ONE M.2 case, so I could run the Pi from an M.2 SSD rather than an SD card. I tossed an M.2 SATA SSD in the basement of the case and went to work. Note – this case doesn’t support NVMe, so make sure you’re not trying to use it here. I installed the latest Ubuntu LTS release on the Pi (22.04 LTS) on an SD Card, transferred the system over to the SSD, changed the bootloader order, and removed the SD Card. All ready.

Next? Just a couple of packages. First up, ser2net. It’s exactly what it sounds like – it lets you bridge a serial port to the network. Most commonly, you expose the serial port so that you telnet to a special port number and boom, you’re connected. Being more security minded, I bind to the loopback and use ssh. More on that in a bit.

One thing that you do need to think about is predictable serial port device names. Linux turns up usb serial ports in the order they’re connected, as /dev/ttyUSB0, ttyUSB1, etc. The hitch here is that things don’t always register as connected in the same order. In other words, you can plug 2 ports in, and they can flip positions across reboots. So what do you do? The udev daemon comes to your rescue here. I found a great guide with procedures on finding all the appropriate parameters. In the end, you’re going to create a udev rules file to map your USB serial ports to persistent names. Here’s my /etc/udev/rules.d/99-usb-serial.rules file:

# switches - internal serial
SUBSYSTEM=="tty", ATTRS{idVendor}=="10c4", ATTRS{idProduct}=="ea60", ATTRS{serial}=="01373013", SYMLINK+="con-sw0-shire"
SUBSYSTEM=="tty", ATTRS{idVendor}=="10c4", ATTRS{idProduct}=="ea60", ATTRS{serial}=="01373118", SYMLINK+="con-sw1-shire"

# prod and lab firewalls - internal serial
SUBSYSTEM=="tty", ATTRS{idVendor}=="10c4", ATTRS{idProduct}=="8470", ATTRS{serial}=="04350063E4F5", SYMLINK+="con-fw-rivendell"
SUBSYSTEM=="tty", ATTRS{idVendor}=="10c4", ATTRS{idProduct}=="8470", ATTRS{serial}=="0435005004C4", SYMLINK+="con-lab-fangorn"

# lab router - dongle
SUBSYSTEM=="tty", ATTRS{idVendor}=="067b", ATTRS{idProduct}=="2303", SYMLINK+="con-lab-isengard"

Once you’ve got that file in place, run the following command to cause udevd to recognize the new config and put the symlinks in-place: sudo udevadm control --reload-rules && sudo udevadm trigger.

Got your persistent device names in-place? Ok, it’s time to configure ser2net. Here’s my /etc/ser2net.yaml.

%YAML 1.1
---
define: &banner \r\n\o [\d]\r\n\r\n

connection: &rivendell
    accepter: telnet(rfc2217),tcp,127.0.0.1,7000
    connector: serialdev,/dev/con-fw-rivendell,9600n81,local
    options:
      banner: *banner

connection: &switch0
    accepter: telnet(rfc2217),tcp,127.0.0.1,7001
    connector: serialdev,/dev/con-sw0,9600n81,local
    options:
      banner: *banner

connection: &switch1
    accepter: telnet(rfc2217),tcp,127.0.0.1,7002
    connector: serialdev,/dev/con-sw1,9600n81,local
    options:
      banner: *banner

connection: &fangorn
    accepter: telnet(rfc2217),tcp,127.0.0.1,7003
    connector: serialdev,/dev/con-lab-fangorn,9600n81,local
    options:
      banner: *banner

connection: &isengard
    accepter: telnet(rfc2217),tcp,127.0.0.1,7004
    connector: serialdev,/dev/con-lab-isengard,115200n81,local
    options:
      banner: *banner

The next piece of the puzzle? Access to those consoles from across the network. I’m handling this with some additional sshd instances. This requires 2 bits of additional config to get going. First, additional config files in /etc/ssh, 1 per additional instance. These instances are configured to telnet to the appropriate localhost-bound console port upon successful connect. As a matter of course, I also turn off PasswordAuthentication, which means no tunneled cleartext passwords, and enable Challenge-Response auth. Naturally, authenticating with certificates is enabled.

Include /etc/ssh/sshd_config.d/*.conf

Port 4000
PasswordAuthentication no
#PermitEmptyPasswords no
ChallengeResponseAuthentication yes

UsePAM yes
PrintMotd no
PidFile /run/sshd_4000.pid

AcceptEnv LANG LC_*

ForceCommand telnet localhost 7000

The last piece, which is completely optional? Setup a WiFi AP on the Pi. I’ve not written up that piece here, as there are plenty of guides on doing that. Be aware of one point though – hostapd and the networkd configuration renderer are incompatible at this time. The solution is to either define your interface in /etc/network/interfaces.d/wlan0, or make sure your netplan config is using NetworkManager as the renderer.

Trading an NFC Sticker for a New Phone Case

Weeks back, I wrote about how I’ve tossed traditional business cards in favor of an NFC-based card. I also mentioned how I picked up some NTAG 215 stickers, and slapped one on the back of my phone case. I’ve actually got 2 different “business card” pages I use – one for business use (the card I keep in my wallet and wave around at business functions) and a personal one for non-business situations (linked from the sticker).

Each page provides a different vCard, be it work or personal. Unfortunately, I found that over the couple of months that I had the sticker in-place first the top coating peeled off, then the black color started to wear off. Less than 2 months and it looks terrible. So, I set off for another solution.

Enter the Nomad iPhone 13 Pro case. It’s got an NXP-branded NFC chip embedded in the bottom. They refer to this as their Digital Business Card. They decided on using Popl for their solution. As I wrote previously, I’m not really interested in inserting a 3rd party between me and the person I’m sharing my info with.

So what to do? I’ve seen folks do stuff like cut the embedded NFC chip out and replace it with a sticker, but I wasn’t really interested in that, as I could have done that with my old case.

Of course, the NFC chip in the case is password-protected with the URL set to Popl’s service. Fortunately, I learned from a Reddit post I turned up that it’s relatively easy to get the password. You see, the password is kept in hexadecimal format in their Android app’s APK file, unencrypted. I’m not going to share it here. Weirdly, I found that I was unable to unlock the onboard NFC chip using any iPhone NFC apps. So, one of my Android-using friends loaded up the NXP TagWriter app on his phone and let me borrow the phone for about 10 minutes. First I changed the password on the chip, then changed out the URL for my own.

I’m happy to report that the tag remains usable, points to the right place too!

Washerbot, the Next Gen of Washer Monitoring

Ok, so I built plugmon a while ago. It worked great. I loved it – super reliable, none of the fiddly nonsense I’ve had to work through with my vibration sensor-based dryer monitoring solution even. Sadly, the Etekcity smart plugs I used before, which used the (really nice) VeSync API no longer seem to be able to be purchased, easily at least.

So, what to do? If the code is to be useful long-term, we’ll need to change the platform to something that’s actually able to be purchased. Without question there’s no shortage of smart plugs available. So, what are desirable features that I’m after when looking for a different platform?

Naturally, I’m after some sort of way to easily talk to the plugs to read data. Of course, it also (should at least) goes without saying that we need a plug that offers the ability to monitor power use, as well as exposing some sort of API to allow use to get at that data without using the vendor’s app directly.

There’s a ton of options out there, but eventually, I landed with the Kasa (formerly TP-Link) plugs. Why? Two things really pushed them over the top. First of course was remote API-style access to the plug’s power monitoring data. But with the Kasa plugs one didn’t even need to go outside the home LAN to capture the data.

At the end of things, I kept the majority of code from jcostom/plugmon, grabbed a few bits of code from other projects I’ve worked on, and in about 30 minutes, the Washerbot was born.

It’s a shame that the VeSync plugs are now so difficult (impossible?) to come by. The API was reasonably easy to work with, and they weren’t terribly expensive either. I’m hopeful that TP-Link / Kasa Smart will be around for longer. I really like the “no outside connectivity” needed part of the python-kasa module as well.

Some may point out that there was a brief dust-up a couple of years ago with TP-Link, when they announced their intention to stop allowing local access to their devices, and you’d be right to do so. Fortunately, TP-Link was smart enough to take the not-so-subtle hints from the community, and walked that change back.

Without further ado, head over to GitHub and check out the new Washerbot code & container. Obviously, you’ll need one of the TP-Link plugs that provides energy use stats, like the KP115.

Throwing Away My Business Cards

Business Cards on Fire

Ok, not really. But think about it. Business cards kind of suck, right? You go through some sort of re-org, the company does a branding change, your role changes, whatever. But that box of cards you got? I bet you didn’t get half way through it before something changed and the cards were rendered useless to some degree.

Maybe a phone number changed and you found yourself scribbling on the cards with a pen and writing the new number in there. Maybe the company’s logo changed and marketing has strictly embargoed use of all the old branding. Whatever, you find yourself, once again, getting rid of a stack of business cards. In my case, there’s another thing I find completely annoying – the cost of shipping the things. My company has worked out some kind of spectacular deal with the company they buy business cards from. But the shipping? Yow. So, 500 cards is like $7, but UPS Ground for that same order is $25. Multiply that times how many people and how often roles and branding changes, and that’s a lot of money and paper.

So, what could we do instead? For the past many years, most mobile phones, whether iOS or Android have had NFC (Near Field Communication) capabilities built in. So what’s NFC do? Without going into the nuts & bolts, it’s a protocol that makes communication between 2 things as easy as bringing them near to each other. It’s how things like tap-to-pay systems work. Like the one in your American Express card, or Apple/Google Pay, etc. The great thing about NFC tech? You can use it to store tons of different types of data and share it between devices.

Ok, so now that I’ve hooked you, how do we save the environment while impressing everyone with our amazing command of technology? If you’re the DIY type (like me) maybe you just program a URL on an NFC device and let folks scan that. Maybe you want something more packaged/turnkey and are willing to cough up some cash to pay for it – there are business models for both. I’ll spend the bulk of the rest of this article talking through the DIY model. If you really want to go down the packaged route – look at something like Popl. They’ve got a bunch of stuff ranging from QR code stickers to a variety of NFC devices coupled with a service that comes in free and subscription versions. The free version frames your content and lacks flexibility, while the pay-for version offers a lot more options. I’m not a fan of sticking a third party in the middle of any interactions I’m having with people I’m sharing my contact info with, so I ruled them out immediately.

Step one – you need something to point folks at. It could be a site like Beacons or Linktree, both of which come in free versions, it could be a social media profile page, like your LinkedIn profile or maybe your Instagram, or perhaps it could be a link to a website you stand up specifically for this purpose. In my case, I went for that last one.

I’m not much of a web designer, though I can do a decent job of modifying someone else’s design to suit my needs. So, I came upon the lovely html5up.net site, where one can find a bunch of great templates to work from. I settled on the Aerial template, swapped out the background for something that had more of a “networking” vibe, ripped out the Font Awesome v5 bits, replaced them with the latest v6 bits, tweaked some bits, created a profile pic using the super cool AI-driven https://thispersondoesnotexist.com/ site, and generated a vCard using the macOS Contacts app. In a few minutes, this demo was ready to roll. Honestly, the demo has the most impact on your phone, since when you hit the link on the far right it launches the vCard in your Contacts app.

Hosting? Free, fast and easy. GitHub Pages. Get yourself a GitHub login if you don’t already have one. Read up on how to turn a simple GitHub repo into a website here. It’s so easy you’re practically done before you’re started. I’m not kidding. Your URL will look something like https://youruser.github.io/.

Ready? Program that into the NFC thingy of your choosing as a URL object. Cool. So, what’s the NFC thingy I’m choosing? Great question. You’ve got options. I’ve got a couple of things myself. My first thing was a metal business card. Yes, metal (who’s making metal fingers right now with me? Yeah, I know.) I got it from Tyler at TapTag. He’s such a good dude. He’ll answer all of the stupid questions bouncing around in your head right now. I know he answered the ones I had – I’m sure he’ll keep going with you too. He’s such a great guy, patient too. Send him your business. Prices are good too.

Another interesting option is an NFC sticker. I picked up some black NTAG 215 stickers from Amazon, and popped one on the back of my phone case. I’ve got 2 actual pages like above. One’s for business use – that one’s linked from the actual “business card” that I walk around with in my wallet and wave around at business functions, and the other is linked from the sticker on the back of my phone case. The business card tag also has a QR code printed on the back side that goes to the same URL for folks who are either NFC challenged, or just plain refuse to scan a tag.

So, do your part, stop wasting all that paper and get with the program.